A significant benefit of using Starfish to manage your student appointments is self-service scheduling, where you set up your availability and allow students to select whichever time slots work best for them (see Add Appointment Availability). However, you may encounter situations where you or your staff need to schedule a Starfish appointment on a student’s behalf – what we informally refer to as “backend scheduling.” This could be because your office triages appointments via front desk staff with Calendar Manager privileges (see Adding a Calendar Manager and Manage Another’s Calendar), or perhaps you need to set up a meeting with a non-UW student using the Prospective Students feature. Regardless of the reason, this page will walk you through how to create an appointment with a student.
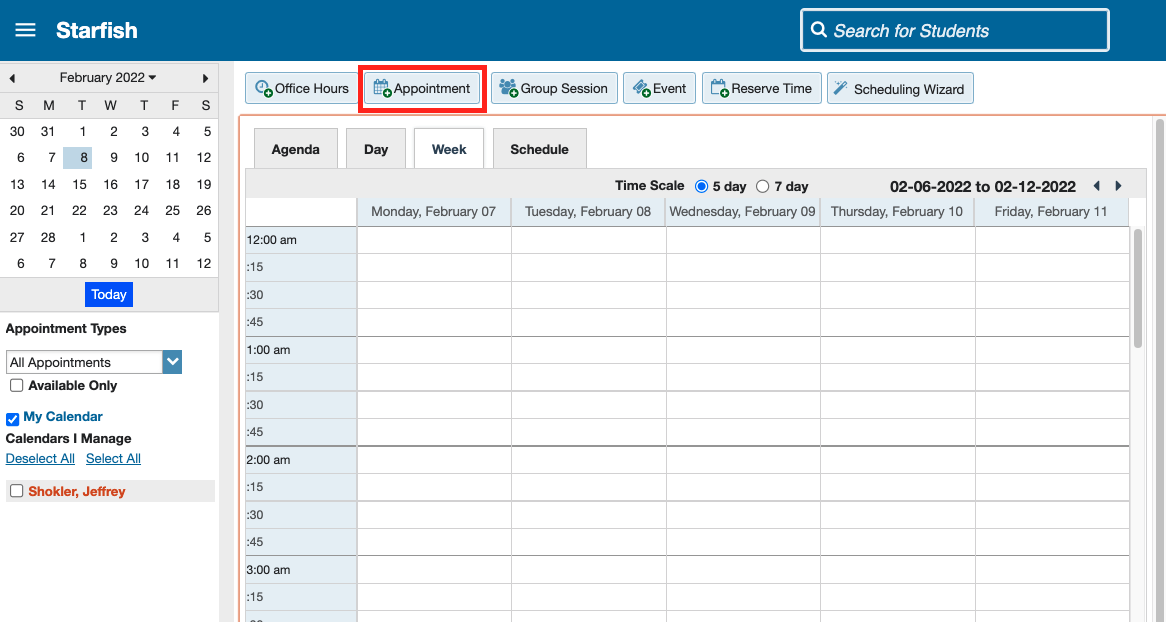
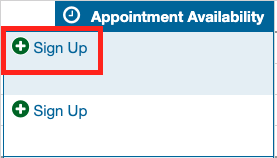
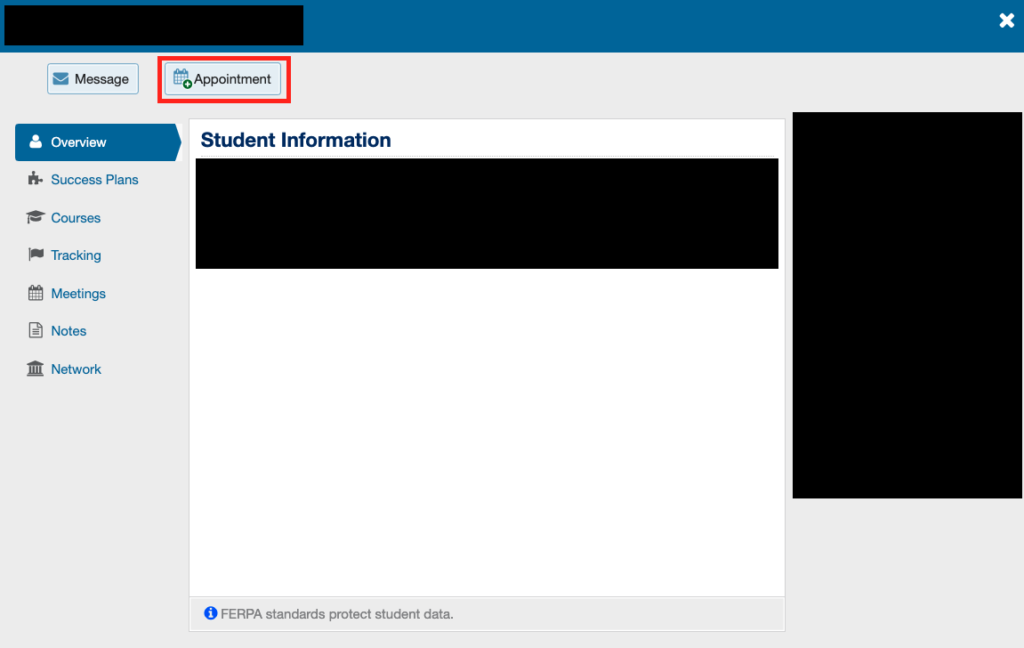
1. There are three ways to enter the appointment creation window.
Click the “+Appointment” button from the calendar or front page:
Click “+Sign Up” on an empty office hour slot:
Click “+Appointment” from within the student folder (either by searching for a student or clicking on their name in any context):
2. Doing any of the above options will open the following window, where you can begin creating the appointment:
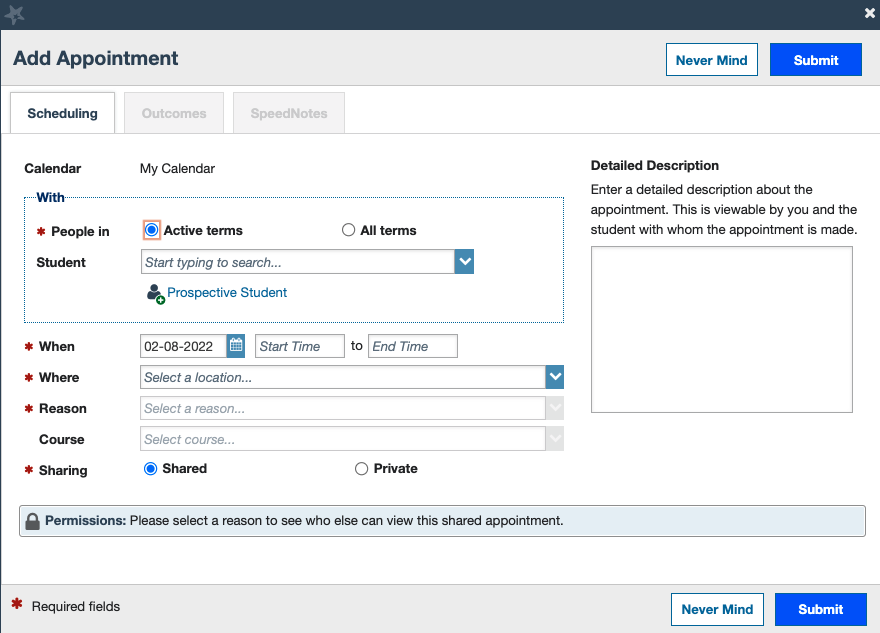
Note that some information may already be populated depending on how you got here. Clicking “+Sign Up” from your calendar will autofill the date and times, and clicking “+Appointment” from the student folder will autofill the student’s name.
3. Enter the student’s name in the Student field if they are currently attending the institution. If you are meeting with a student who does not have a Starfish account through UW-Madison, click the Prospective Student button to find or create a prospective student profile. (This can include interested students who haven’t applied or been admitted, admitted students who are not yet eligible to enroll, withdrawn students, or any other students who don’t have current formal affiliations with UW-Madison.) Watch this video tutorial for more information on creating appointments with Prospective Students.
4. Enter the date and time in the When field.
5. Select a location for the meeting in the Where field. Note that you will first need to complete the My Locations section in Appointment Preferences before completing this step.
6. Select a reason in the Reason field.
- If you have trouble navigating this dropdown list and finding the reason you should pick, refer to the FAQ on the main page titled “I’m setting up an appointment or a group session, and the Reason dropdown menu is a confusing mess. How do I tell which reasons are part of which appointment types?” Or reach out to starfish@advising.wisc.edu for assistance.
7. Optionally, select a course that this meeting is about in the Course field.
8. Choose whether you want this appointment to be visible for other staff viewing the student’s meeting history. Unless the meeting is of a sensitive nature, we recommend selecting Shared.
- Choosing Shared will list out which roles have access to see this appointment. The list of roles that appear is based on the reason/appointment type selected.
- Choosing Private will still allow any of your calendar managers to see the appointment on your calendar.
9. Optionally, include any notes in the Detailed Description box for why the student is seeking an appointment.
10. Click Submit.